Pages

Showing posts with label gifts for women. Show all posts

Friday, November 23, 2012

Handmade Holidays Project 4

DIY Branch Storage Rack.


Supplies Needed:
Branch, knife, Paint in three colors, paint brush, hammer, and nails.

Step One: Step outside and find a branch! Nature is my favorite art supply store. The prices are always right too :)

Step Two: Bring your branch inside. If it's damp you might need to let it dry out over night. 

Step Three: Strip off the excess bark. Just take your knife and scrape the branch in a downward motion away from your body. If there is still some left its no big deal, it will add texture. 

Step Four: Time to Paint! Use your three paint colors to add stripes to your branch. I just free handed it because I didn't want it to look exactly perfect but if you want yours to be more even I would suggest using tape. I also left the ends of the branch natural.

 Step Five: Hammer Time! Nail five or six nails spaced evenly along the painted part of your branch. Make sure they stick uot far enough to hook things on. After your finished its ready to hang!!

I think this is would make a great "guy" gift because its useful and decorative but not girly. Its a great project for any one. It would be a beautiful towel rack in a bathroom too. 

Hope you enjoy making this project! If you make any projects from this blog I would really really love to see pictures!!

Hope ya'll had a spectacular Thanksgiving!
-Kirsten

Saturday, November 17, 2012

Handmade Holidays Project 3

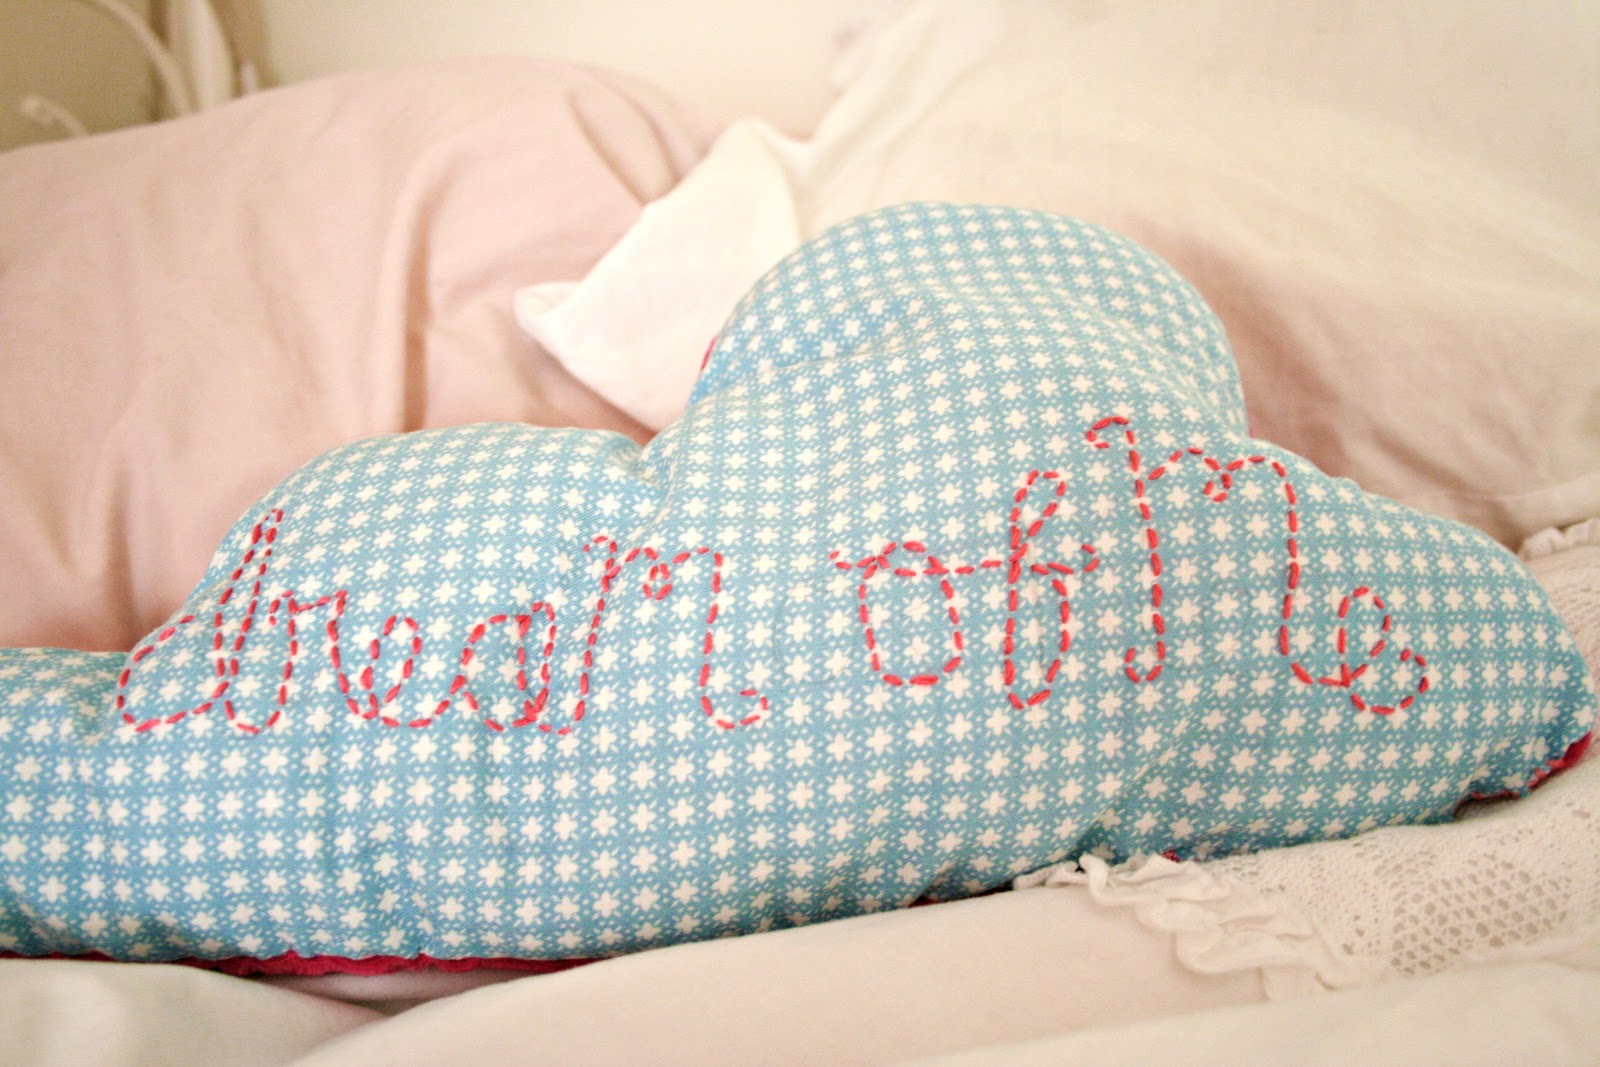
DIY Embroidered Cloud Pillow


Supplies:
Fabric in two colors, needle and thread in two colors, embroidery hoop, scissors, pencil, and poly fill. 


Directions: 
Draw a cloud shape on your fabric. I chose a light blue pattern cotton fabric for the front and a hot pink velvet for the back of the pillow. I drew the cloud on the light blue fabric and cut it out. I then used that cloud as a stencil for the pink velvet backing. 


After your clouds are cut out pick the side you intend to embroider and write your message on it with the pencil. I wrote "Dream of me." Put your fabric on the embroidery hoop and make tiny stitches following your pencil outline. 


When you are finished with the embroidered message flip the two clouds inside out/ front sides facing each other, and stitch all around the edges but leave a small opening for stuffing.


Then fill it up! 

"I helping" - Sammy

Lastly, stitch the opening closed and fluff it up and ta dah!! Its ready!


Sweet Dreams

xo
kirsten

Etsy Loves Under $10

For this weeks "Etsy Loves" post I decided to compile a few gift ideas all for $10 or less. I know I'm not the only one on a tight budget this year so here are a bunch of cute handmade and vintage items that are easy on the wallet...

For the ladies...


one, two, three, four, five, six,

and the gentleman...


one, two, three, four, five, six, 
seven, eight, nine, ten, eleven

Happy bargain shopping!

Kirsten

Monday, October 29, 2012

DIY Long Beaded Necklace


So in the last few months I have been trying this whole "following my dreams to be an artist" thing and while its the most amazing feeling in the world to do what you love every day it also comes with a lot of sacrifices. Like a steady salary for instance. So this year with being a starving artist and the state of the economy I have decided to give mostly handmade gifts this holiday season along with a few small etsy purchases and thrifted treasures. Handmade gifts can be just as special if not more so as store bought gifts. I love a handmade gift because it is so special and unique and so much care and love went into making it. I have put together several easy thoughtful gift projects that are all under $10.00. I know I am not the only one having to make sacrifices this year but I didn't want to miss out on gift giving all together because I really enjoy giving the people I care about presents. Its one of the ways I say you are special to me and care about you and I'm so glad you're in my life. You can join me in making this cheap winter solstice even better than if we'd all won the Lottery or at least a more meaningful close second :)

DIY Long Beaded Necklace


Supplies Needed: Scissors, fishing line or bead chord, small beads, large bead or gem, ribbon, and hot glue gun. I purchased my beads and ribbon from Hobby Lobby and the other supplies I had on hand. If I have to go to the craft store to buy something I ALWAYS bring a coupon or wait for a sale. In this case the beads were on sale already at 50% off and I used a 50% off one item coupon for the ribbon. Craft stores like, Joanne's, Hobby Lobby, and Michael's almost always have some kind of promotion or coupon running in the weekly paper or online. If you take the extra time to print/cut them out you'll save yourself a ton of money. NEVER EVER PAY FULL RETAIL!! Craft stores can really be a rip off. 


INSTRUCTIONS

Cut a long piece of fishing line and tie a sturdy knot on one end big enough so the tiny beads can't slide off. String your beads and statement gem. Tie the ends together in a sturdy triple knot and trim the excess ends. Cut a small strip of your ribbon and place under the knot. Add a small dab of hot glue and tie the ribbon in a knot around the glue so that the necklace won't break. Trim the excess ribbon and voila! You're done. Easy and cheap yet still pretty. I love long necklaces and wear them frequently. I think they make excellent winter fashion accessories because they look so cute with sweaters. 


 If you make any projects from this blog I would love to see how yours turn out. Add it to the Homemade Holidays board on on my Pinterest. 

xo Kirsten


Related Posts Plugin for WordPress, Blogger...