Pages

Showing posts with label crafts. Show all posts

Wednesday, April 16, 2014

Bunny Tales

So I read this article a while back about how 2013 was the year of "Shaming." Ya know, fat shaming, slut shaming, and of course Dog Shaming. I know its 2014 now but my mom sent me these Bunny Shaming photos and I just about died. So hilarious! And speaking of silly buns, my bunny broke into the food stash again so I've had to start storing the bag on top of his hutch. The little glutton. He is so cute though! I think I've only ever been mad at him for 5 seconds total. 


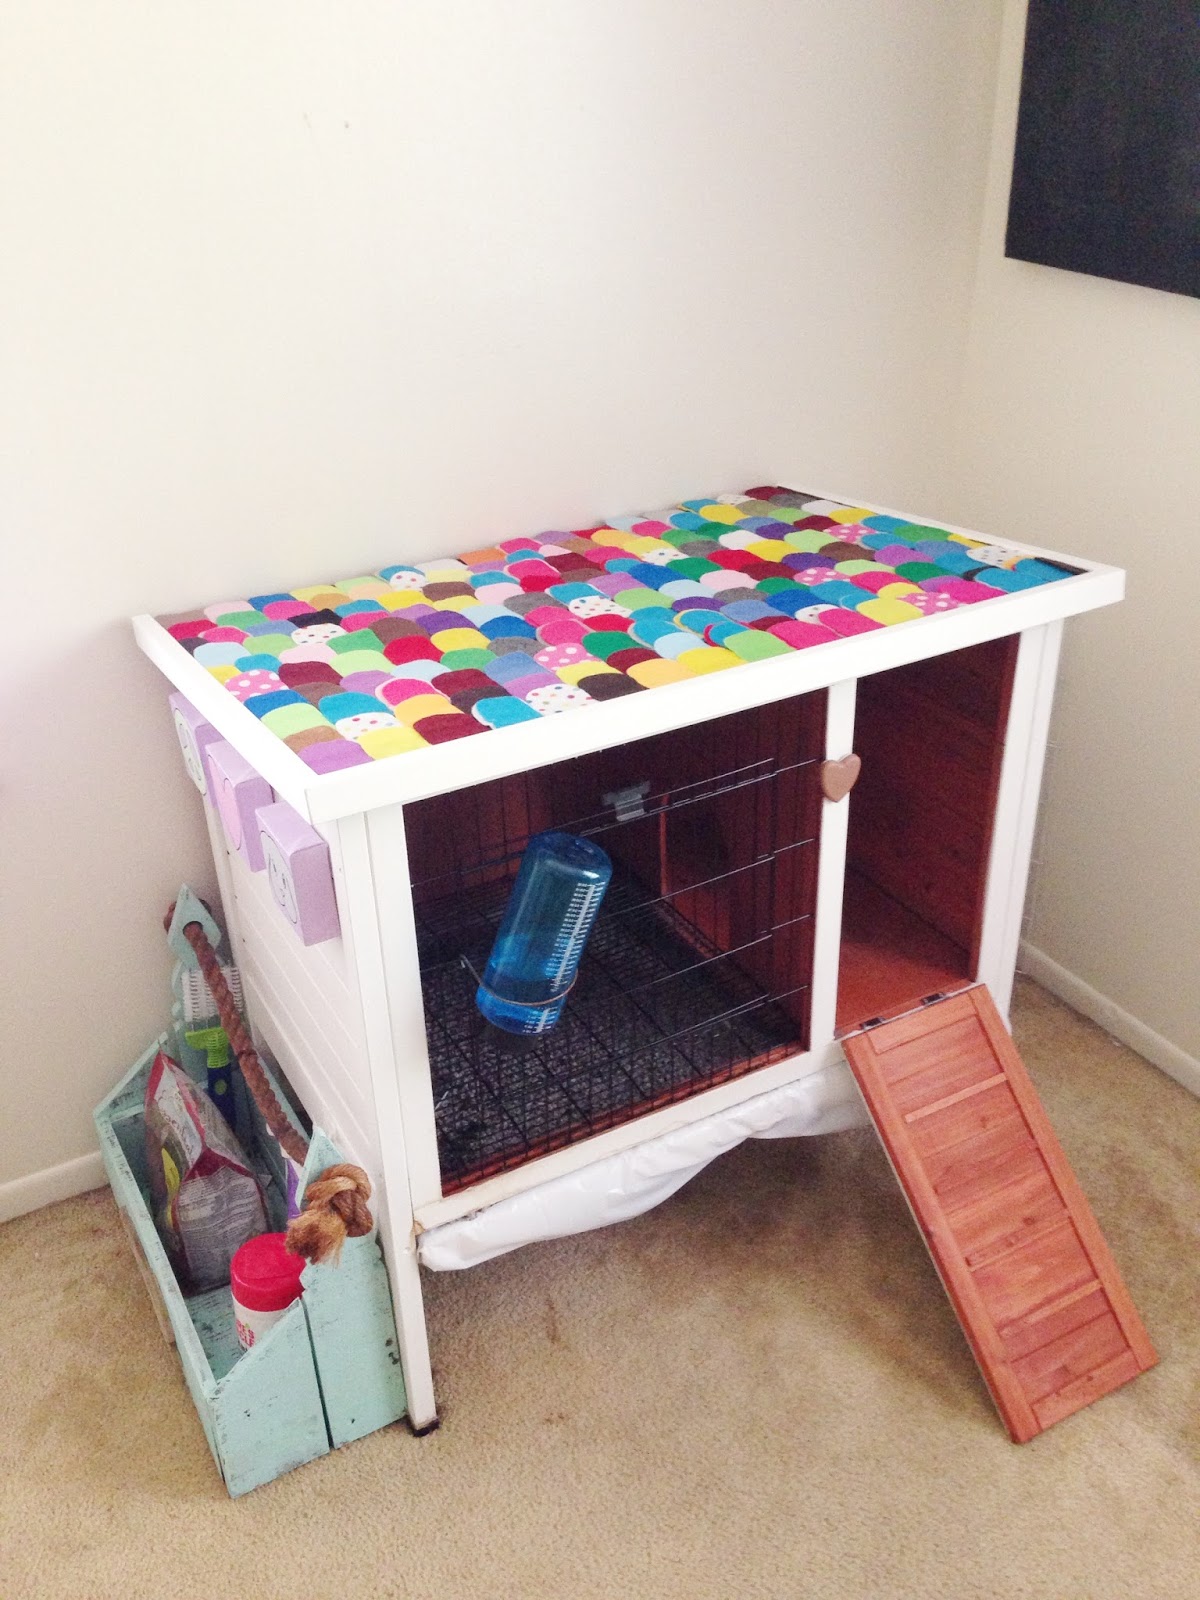
 Sammy has moved up in the world and has this spiffy new crib. We are both enjoying it. I for its cuteness and Sammy for its coziness.


 I purchased this adorable wooden bunny box at an antique mall. I eyed it for a while and my mom bought it for me, lucky no one else snagged it! Its truly perfect for storing all the rabbity supplies. The, too adorable for words "peace, love , and bunny" signs were made by my little sister and add the perfect finishing touch. I am so glad he finally has such a great set up. We have struggled over the years trying to find the perfect combination of function and aesthetic. Having an "exotic" pet can definitely pose its challenges at times. They make all of these cute dog and cat pet beds and houses but finding a bunny house sucked! Even after I found the right thing I had to customize it to fit my tastes and not be a total eye sore in the home. I am finally happy and so is Sammy. He loves hopping in and out and using the ramp. What  type of home/enclosure do you other bunny/ small animal parents out there use? 

Monday, December 23, 2013

DIY: Holiday Greeting Card Wreath

Here is a simple, last minute Holiday DIY for you. Perhaps you have already amassed a good amount of greeting cards from all of your loved ones this season or perhaps you are like me and you just love to collect vintage cards. Either way, you can turn all of those pretty cards into a little wreath for another last minute decoration for your holiday party. All you need is a flat wreath, a stack of cards, some ribbon of sorts, and about 15 minutes. 


 Voila! Easy wreath! Happy Holidays and Merry Christmas to you all! 

Monday, July 29, 2013

Purse Makeover DIY


This is my most favorite lime green purse. As you can see from the before photo the straps had seen better days. The rest of the bag is fine I just loved this purse so much I literally wore the straps off. I didn't want to get rid of it so I decided to add new, less-destructable, handles.

SUPPLIES:
Split rings (like a key chain), bolt cutter, beaded chain, and of course a battered purse. 

DIRECTIONS:

1) Use your bolt cutter to cut the chain to your desired length. I purchased 3ft of beaded chain from the hardware store. If you don't have a bolt cutter you can usually ask a store employee to cut it into two pieces for you. 

2) Remove your old straps and add the split rings. My bag already had some convenient metal rings to hook mine onto. Depending on your bag and how your handles were attached you might have some too or fabric loops of some sort. Split rings are great because you can pull them apart and slide them onto pretty much anything and they are sturdy. If there are none and your straps were sewn directly to the bag, I recommend trimming the straps down but leaving enough to create your own loop with a few simple stitches.

3) Add your chain and its ready to wear!

Hooray! My purse is pretty again!

Thanks for stopping by! <3 Kirstie

Sunday, April 21, 2013

Life Update

Hello everyone! I hope you are having a splendid week! I would first off like to welcome all of my new lovely followers and say hello and I'm so glad you're here! Things have been happening. Not bad things. Some really good, some new, different, and intimidating. A large amount of anxiety has been keeping me mainly in the company of family at present. I have been making plans for this blog that make me really excited! I think its important to always have things, no matter how significant, to look forward to...


#1- Lately I cannot get enough Arrested Development I can't wait until next month when the new episodes are released on Netflix. 

#2- Missing people can really suck 

#3- These are some super cute bunnies I made with the kiddos at work. I am going to do a blog post on kid crafts soon. Arts/crafts is a great learning/bonding activity that children love and its something I'm passionate about. 


#4- My little bunny Sammy gave me quite a scare two weeks ago. I let him out of his cage to play and noticed he couldn't really hop around and he kept falling over. I rushed him to the vet and he had a parasite that was causing his symptoms. He is on a few meds for the rest of the month but he is doing so much better and can finally run and play again. It was pretty terrifying. The affliction is often referred to as "wry neck" apparently. If you are also a bunny parent here is some info on it that a friend shared with me... http://www.barbibrownsbunnies.com/ecuniculi.htm


#5- Color coordinated Target purchases.

#6- Planning fun things for this blog and searching for inspiration and getting organized. 

#7- Shopping with Hot Dot (my grandmother) and eating snacks in the car. Coke and M&M's is a Kirsten special. 

Right now I'm snugged up in a blanket with my new Macbook Pro eeeeep! watching The Princess Bride. I had forgotten what a gem this movie is. Goodnight y'all. 


Saturday, March 30, 2013

Hand Painted Lyrics On Canvas DIY


As you may know if you have if you have been following my work, a lot of my paintings are inspired by music... 

Like this one...

or this one...

and this one...

I was jamming out to some Robyn the other day, she is a goddess, and I was inspired to make this cute piece. Super easy and super pretty. If you want to make one...here's how...


Supplies:
Canvas, mine is 8x10, black, blue, white, and gold paint. Scissors, needle, white embroidery floss.

Directions:


So first take your blue paint and add a little black to make a rich blue color. Then cover your entire canvas and let it dry...


Next it's time to play connect the dots. The lyrics I chose are "You and me together, Stars 4 eva" from her song, "Stars for Eva." I used my gold paint to make little stars at the points of the letters and then used the white paint to connect and complete the letters. I guess I wanted the font to resemble constellations. I added a few stars in the background and let it dry.


 Next I wanted to add some texture to this piece. I used white embroidery floss and stitched over the white paint on the letters. I didn't do all of the letters and some only have a little stitching accent. I really just wanted to give it some interesting texture. I then touched up the gold and added some diamonds to the background.


Super easy to make and now I have a fun little accent for my room. I hope you enjoy this project. It would also make a cute gift for someone special <3 


Wednesday, March 6, 2013

Cloth Napkin DIY


 So a while back while I was thrifting I came across these two matching cloth napkins for a mere 25 cents and I scooped them up thinking I could use them for something down the road. I thought they had a pretty pattern and I liked that they were a set. Originally I was thinking of making a pillow out of them but I decided to keep them napkins. One thing I've been wanting to do a lot more lately is go on picnics. So I designated these my new picnic napkins because they are reusable and large enough that they make a good placemat too. I added these handmade appliques to personalize them and give them a little extra something. Here is how I did it...

SUPPLIES:
Cloth napkins, felt in three colors, needle, thread, scissors, marker, and hot glue or fabric glue (not pictured).


DIRECTIONS:
Start by making a heart stencil. I cut this one out of pink felt and used it as a stencil so the hearts would be the same size. Then lay your heart on to one of the other felt colors you chose and cut a second heart so that its a little larger than the first one.


Next, use your marker to write out "Madame" and "Monsieur", you could also do something cute like "Je Taime" and "Amour" or maybe "Yummy" and "Delicious", you can use your imagination for this part...and then use your needle and thread to embroider over the words. Lastly, use your glue to adhere them to the napkins.


Sooo Cute! I can't wait to go on a picnic date with someone special. <3 <3 <3 
Related Posts Plugin for WordPress, Blogger...